Starter Guide: How to Import and Customize a Basic Contact Form
 Did you know Gravity Forms has a Form Template Library? Within our form library, you can browse a selection of form types, including contact forms, payment forms, application forms, and many more. Importantly, all of these customizable form templates can be imported to your website, customized, and used on your site.
In this Starter Guide, we walk you through how to download a contact form from the Gravity Forms template library and import it to your WordPress dashboard. We then look at how to customize the contact form template, so you can make it relevant to your exact needs. Let’s get started…
How to Download a Contact Form from the Form Template Library
Within our Form Template Library, you will find two stylish contact forms to select from – a basic and an advanced version. Here’s a quick summary of each…
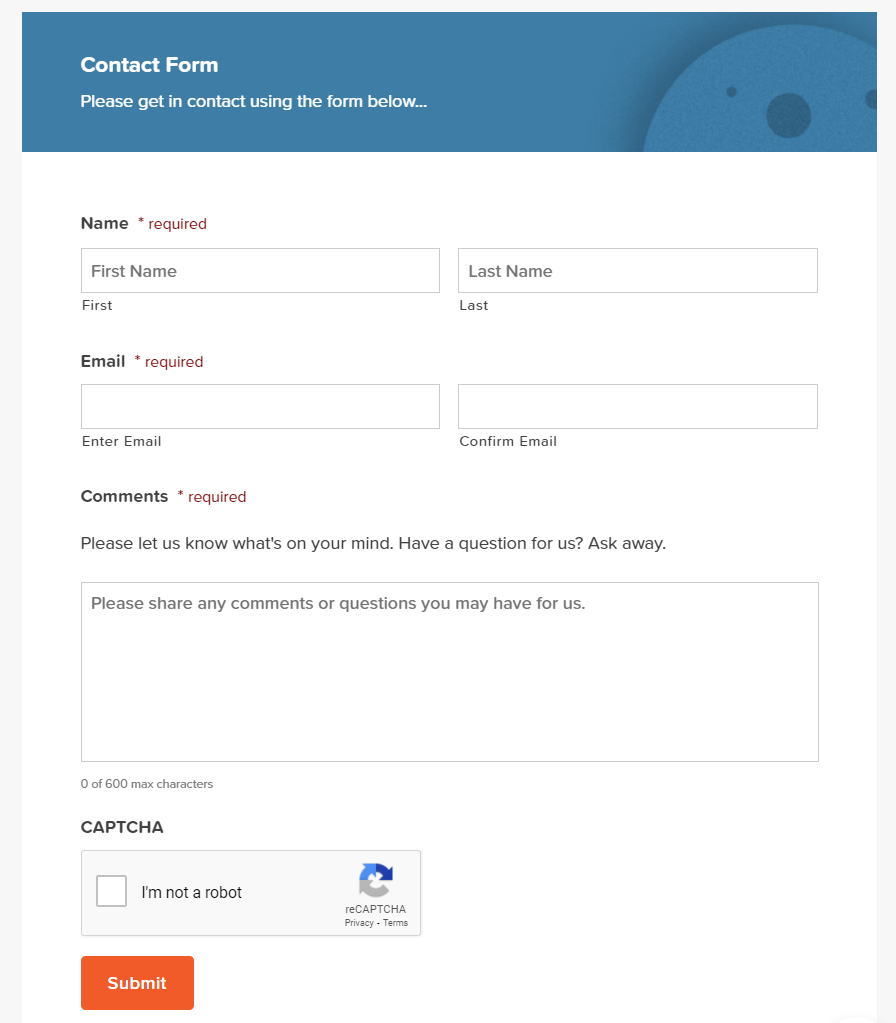
- Basic Contact Form – This form is as simple as they come and is a great starting point for creating a custom form that will help you quickly and easily engage with your audience and collect leads.
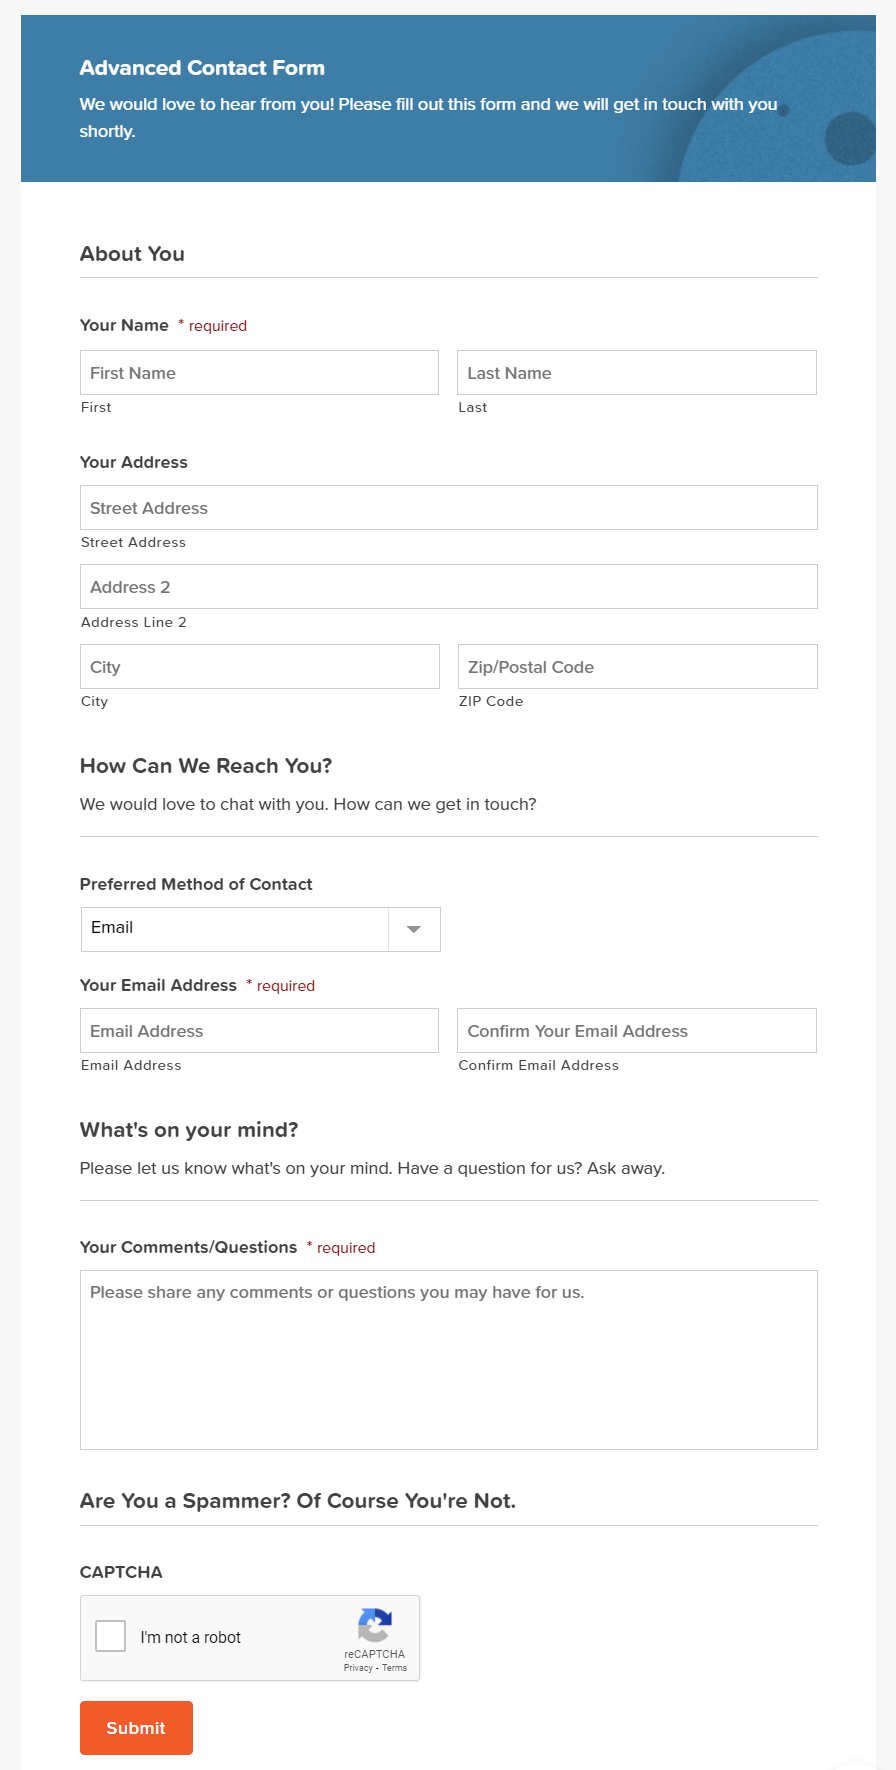
- Advanced Contact Form – This contact form is for those looking to collect a bit more information from their audience than just a name and email address. Using conditional logic, this advanced contact form template enables you to personalize the form by tailoring the questions asked, helping you to gather specific information.
All the form templates within the library are totally customizable, so select the option that is the closest fit to your needs – for this Starter Guide we will focus on the importing and customizing the basic contact form.
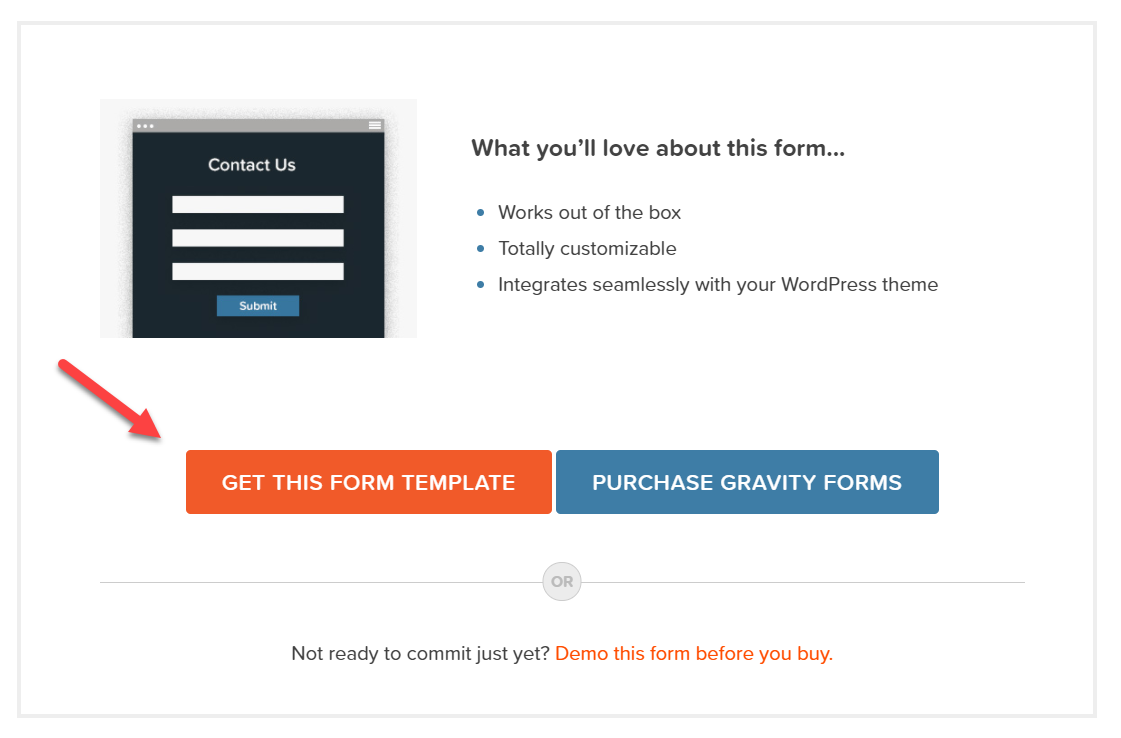
To download a template, simply scroll down the appropriate form template page and click on Get This Form Template. The form will now download to your computer as a JSON file.
How to Import a Contact Form into Your WordPress Website
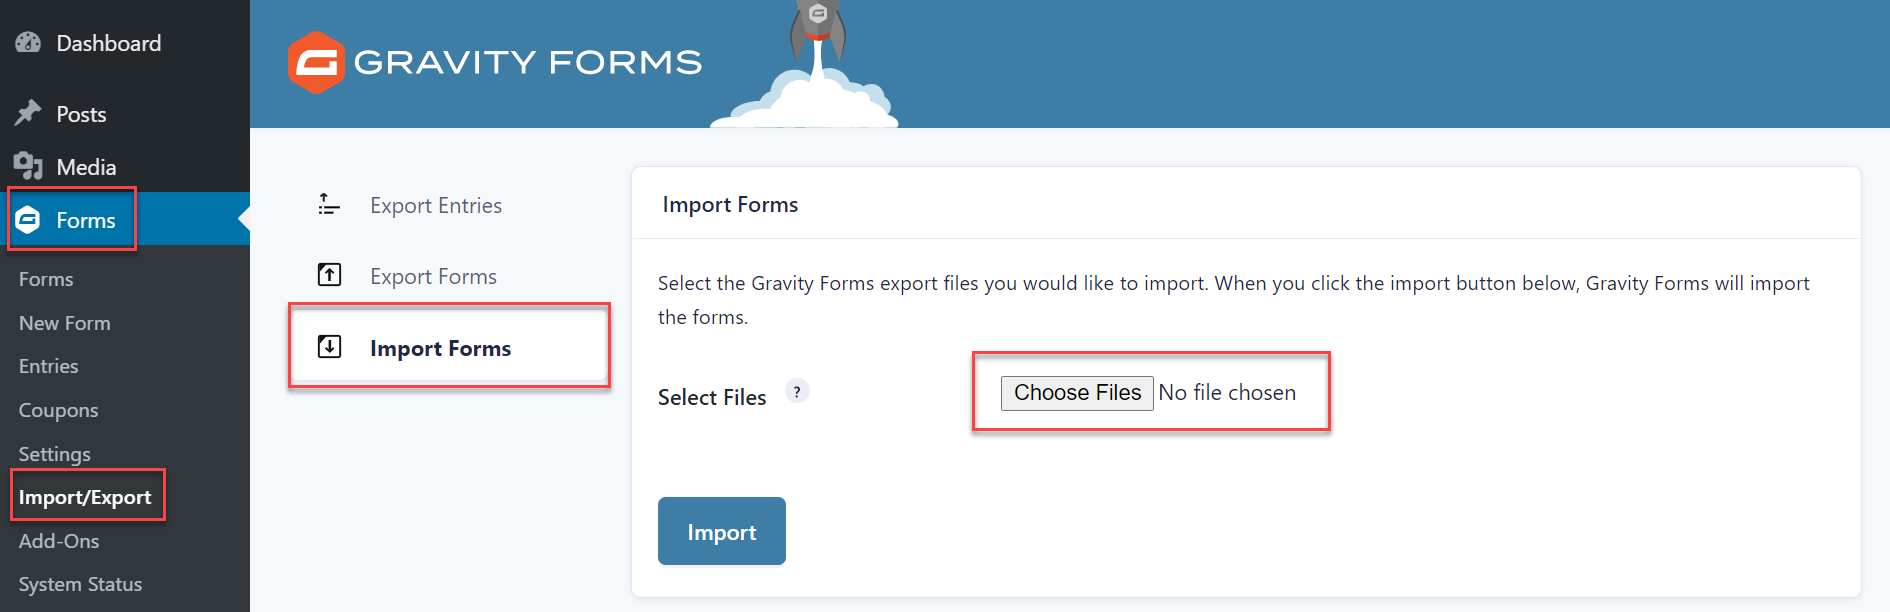
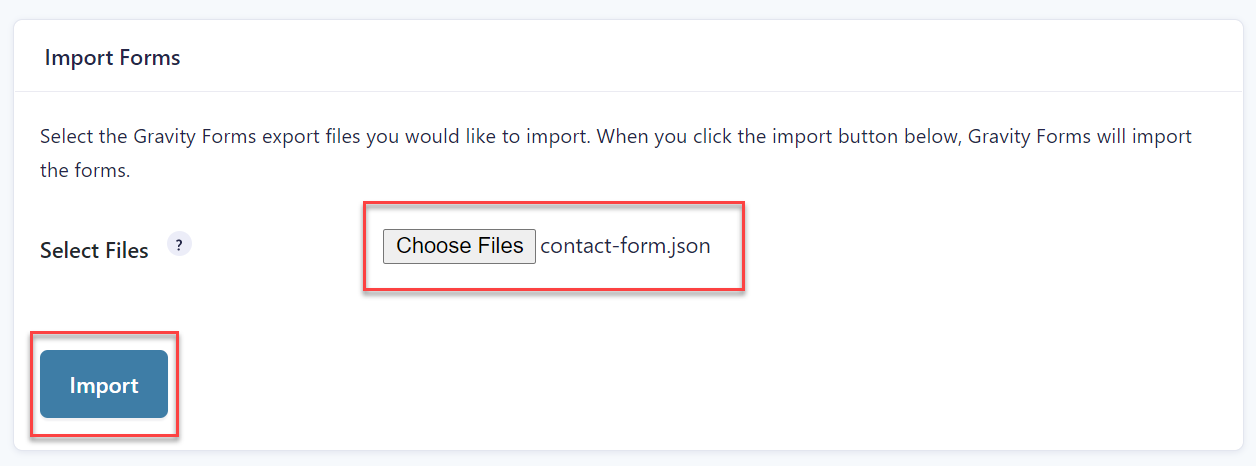
Importing the downloaded form template is a quick and easy process using the Gravity Forms Import/Export tool. Simply open your WordPress dashboard and select Forms > Import/Export. Then from the Gravity Forms menu on the left select Import Forms and click on Choose Files.
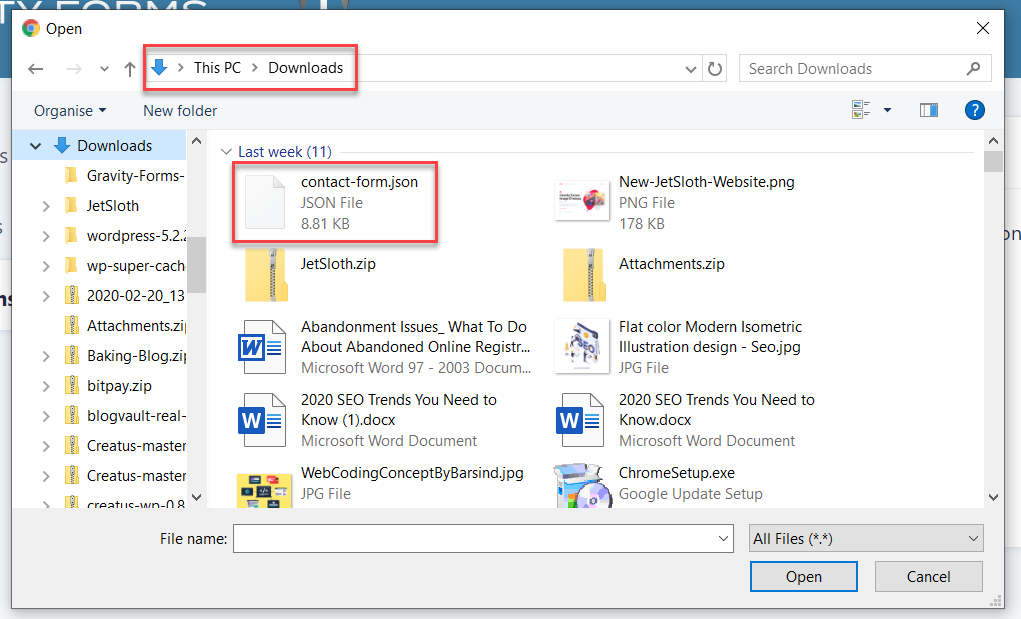
From your computer files, go ahead and select the contact form template that you previously downloaded.
Once the file is displayed within the Import/Export tool, click on Import.
After a successful import, Gravity Forms will display this message…

Now click on Edit Form to start customizing the form.
By default, the contact form is 100% ready to be used on your website. However, there are a few settings that you may want to customize for each field to help ensure your contact form is relevant to your business and audience…
How to Customize an Imported Contact Form Template
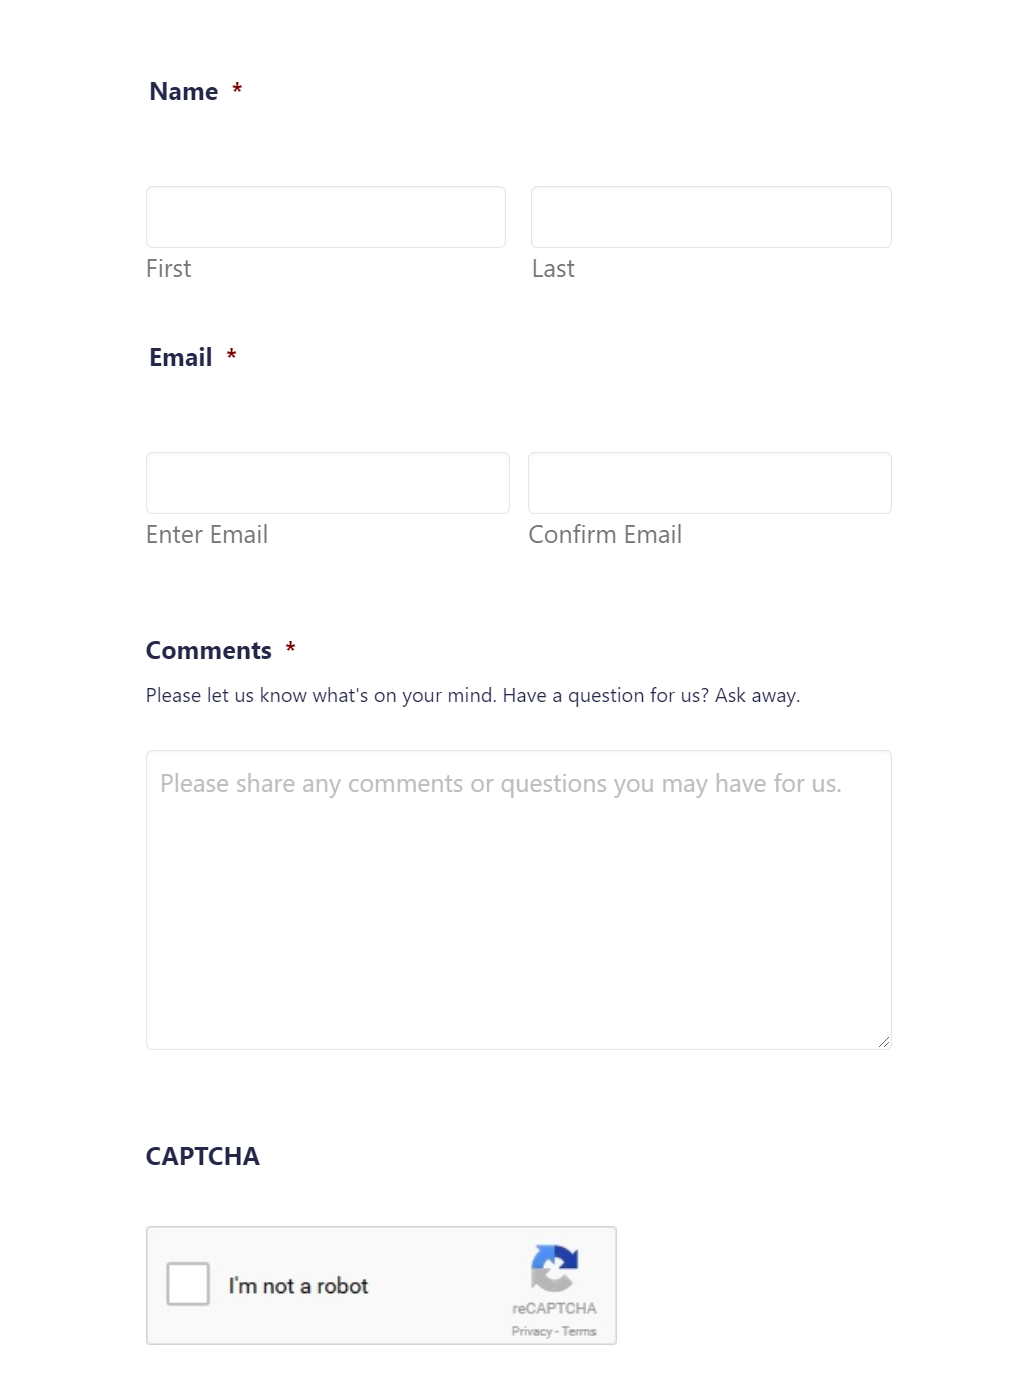
As you can see in the image above, the basic contact form template consists of 4 form fields…
- Name
- Paragraph Text (Comments Section)
- CAPTCHA
So let’s take a look at some simple customization options for each of these fields…
Name Field
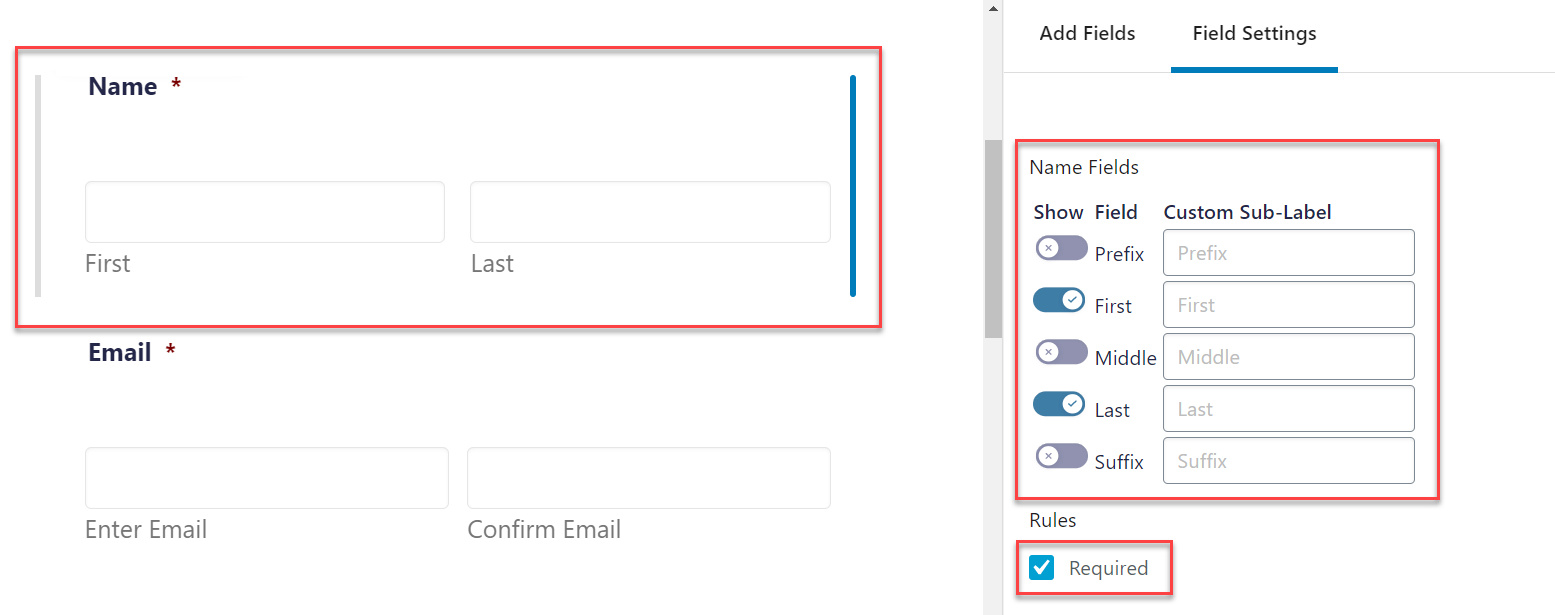
Click on the Name field to open the Name Field Settings. There are a couple of settings here that you may want to customize…
- Name Fields – Enable the name fields that you would like your users to complete.
- Required – By default the Required field is enabled on this contact form template, but it can be easily disabled here. (Making a field Required means a user cannot submit the form unless they have completed that field).
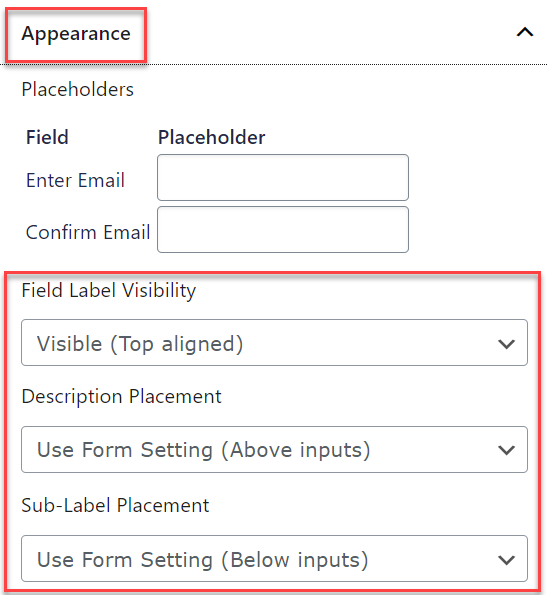
- Appearance – Under Appearance you can customize the placeholder text, as well as alter the positioning of the text. Have a play around and see what style works best for your form and website.
Have a read of the Name Field article in the docs for more information on Name Field Settings.
Email Field
The contact form template Email field ships with Email Confirmation enabled. This feature will ensure that your users have to enter their email address twice, helping you to collect legitimate leads.
However, this feature also adds an extra step to the form submission process and can put some audience types off completing the form – for example, new subscribers you are yet to form a relationship with or cold leads that you don’t want to scare away with too many form fields.
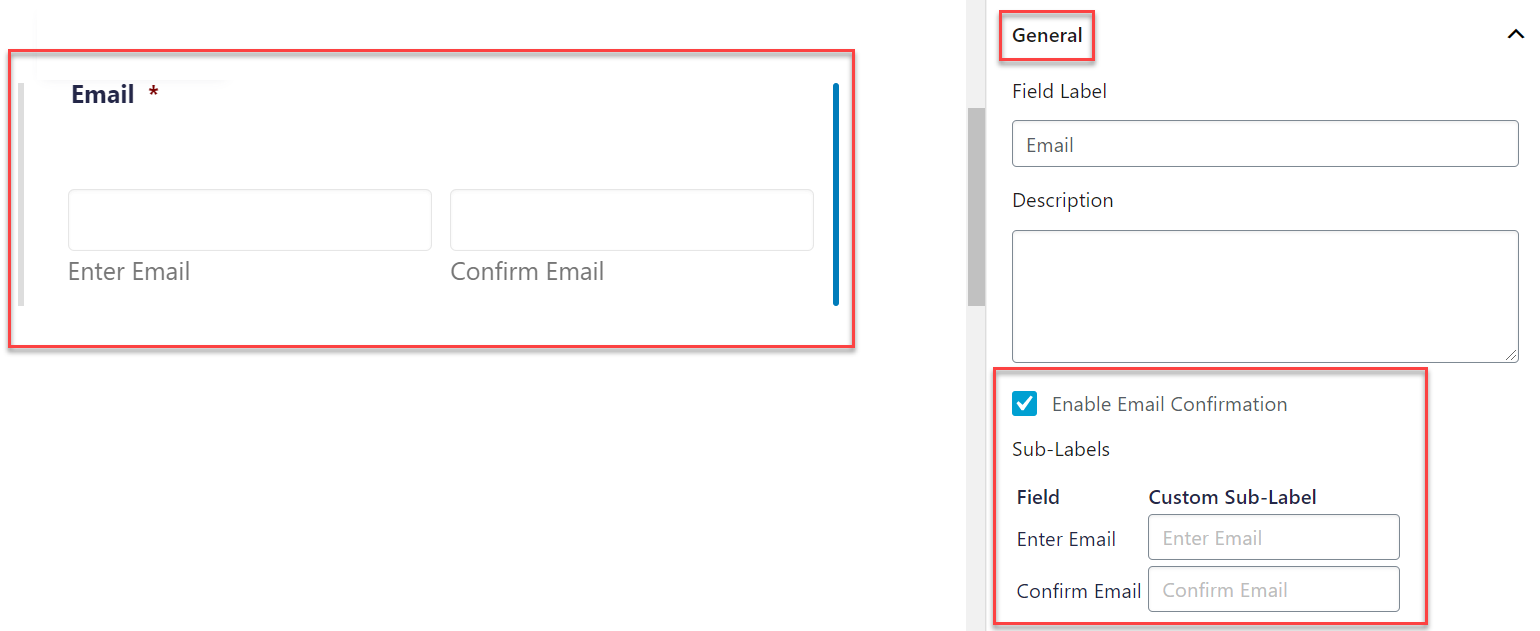
To disable Email Confirmation, simply click into Email Field Settings and deselect Enable Email Confirmation.
The Email field contains many of the same common field settings as the Name field – for more information on these options check out the Common Field Settings documentation.
Paragraph Field (Comments Section) and CAPTCHA
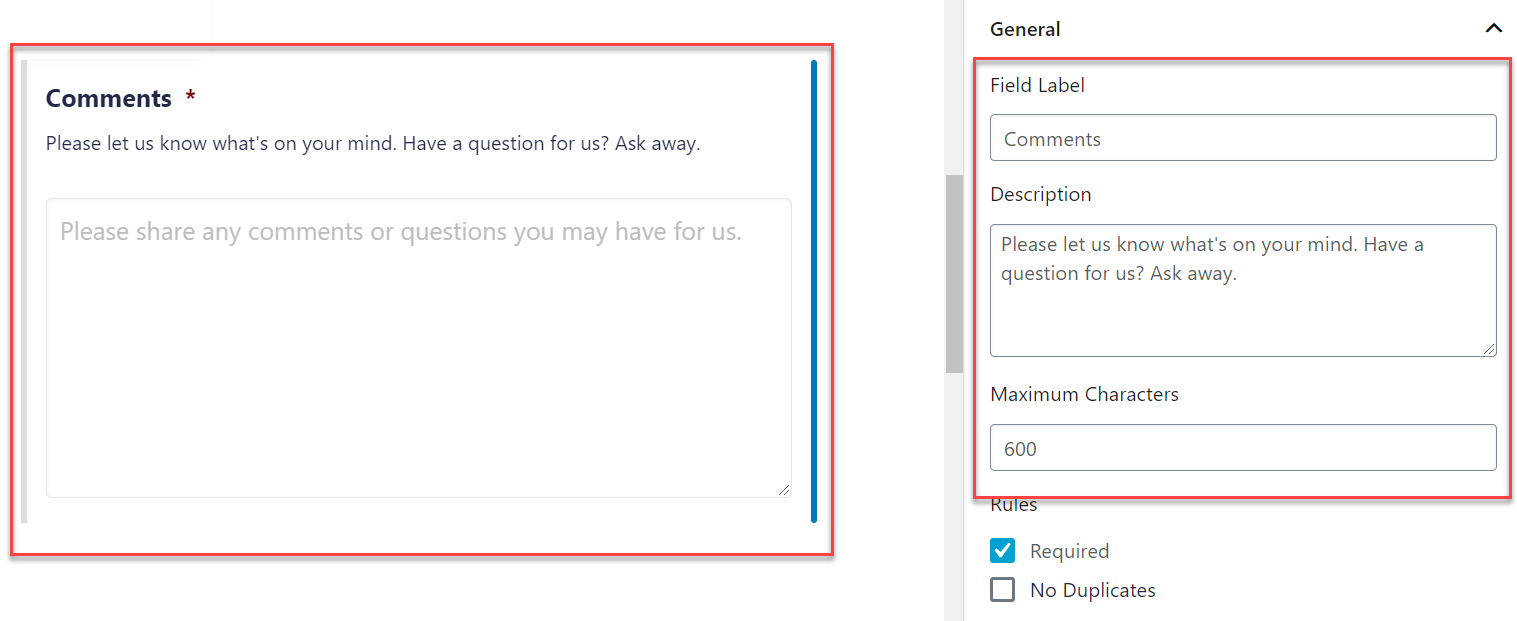
The comments section has been created using the Paragraph field. Possible settings that you may want to edit include…
- Field Label – Change the text in the Field Label box to rename the field. For example, you could change the Paragraph field label from Comments to Leave Us a Message.
- Description – Change the text in the Description box to engage with your target audience and help them understand what this field requires of them.
- Maximum Characters – Set a fixed maximum number of characters to keep a user’s message to a manageable length.
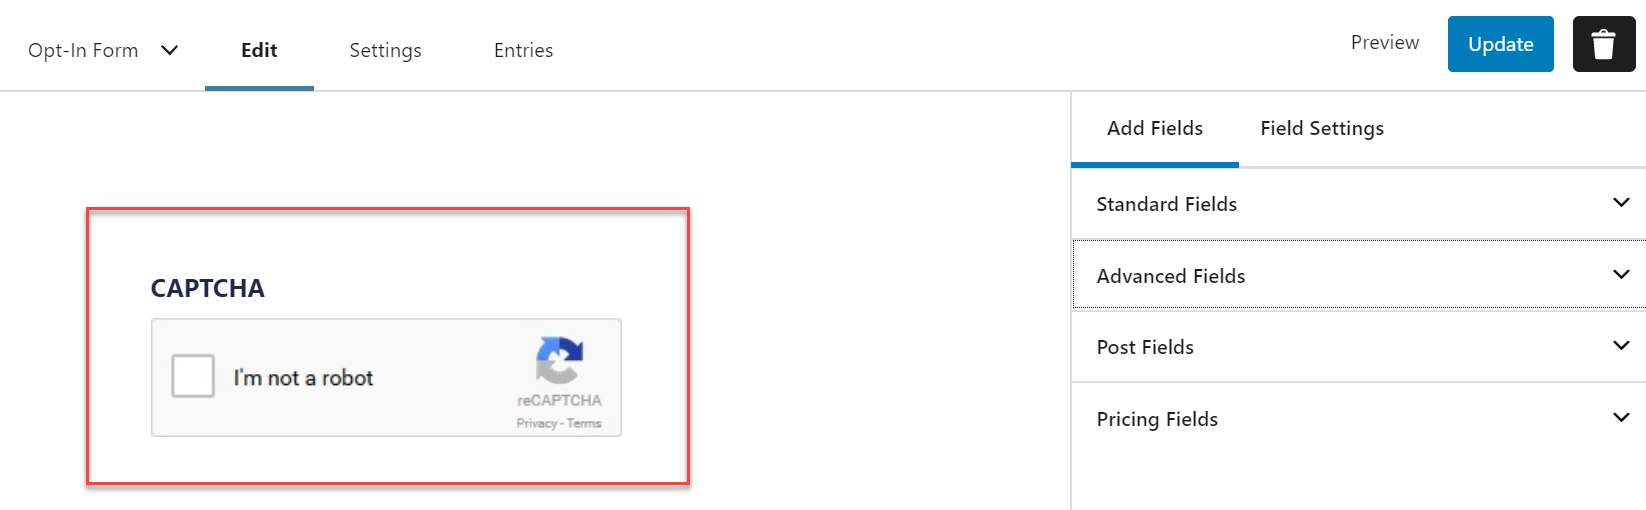
The CAPTCHA field has already been written about in detail on the blog – to find out more about why you should use it and how to set up this feature, have a read of this article, How to Add ReCAPTCHA to Your Forms.
Adding New Fields
You may want your contact form to collect some extra information other than just name and email.
To add a new field to your contact form, simply click on a field from the Add Fields menu and then drag and drop it into the editor – popular fields for a contact form can mostly be found under Advanced Fields.
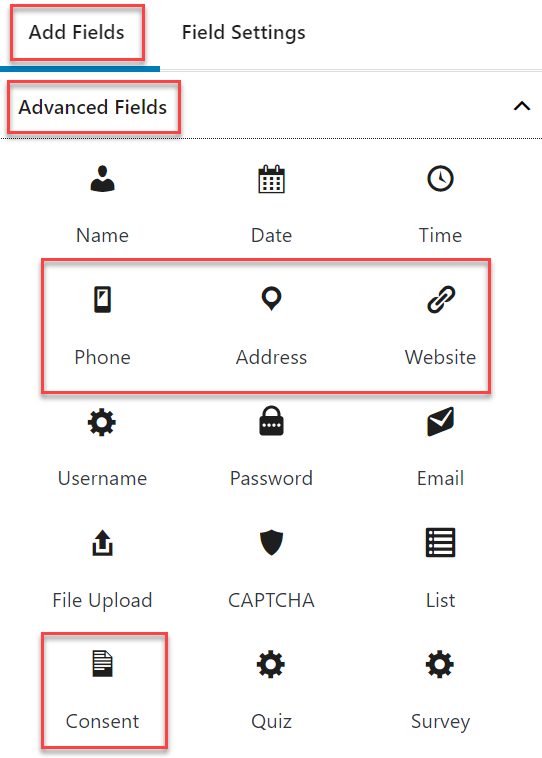
Extra fields you may want to consider adding to the contact form template include…
- Phone
- Address
- Website
- Consent
Although we won’t go into detail about the Consent field in this article, using this field to ask people to agree to your privacy policy, and the handling of their data, is an effective way to protect your website against privacy-related lawsuits.
For more information on the Consent field, check out this article How to Collect and Store Consent with the Gravity Forms Consent Field.
Form Settings
Form Settings are set up by default, and require no further action unless you want to customize specific settings. Here are a few options…
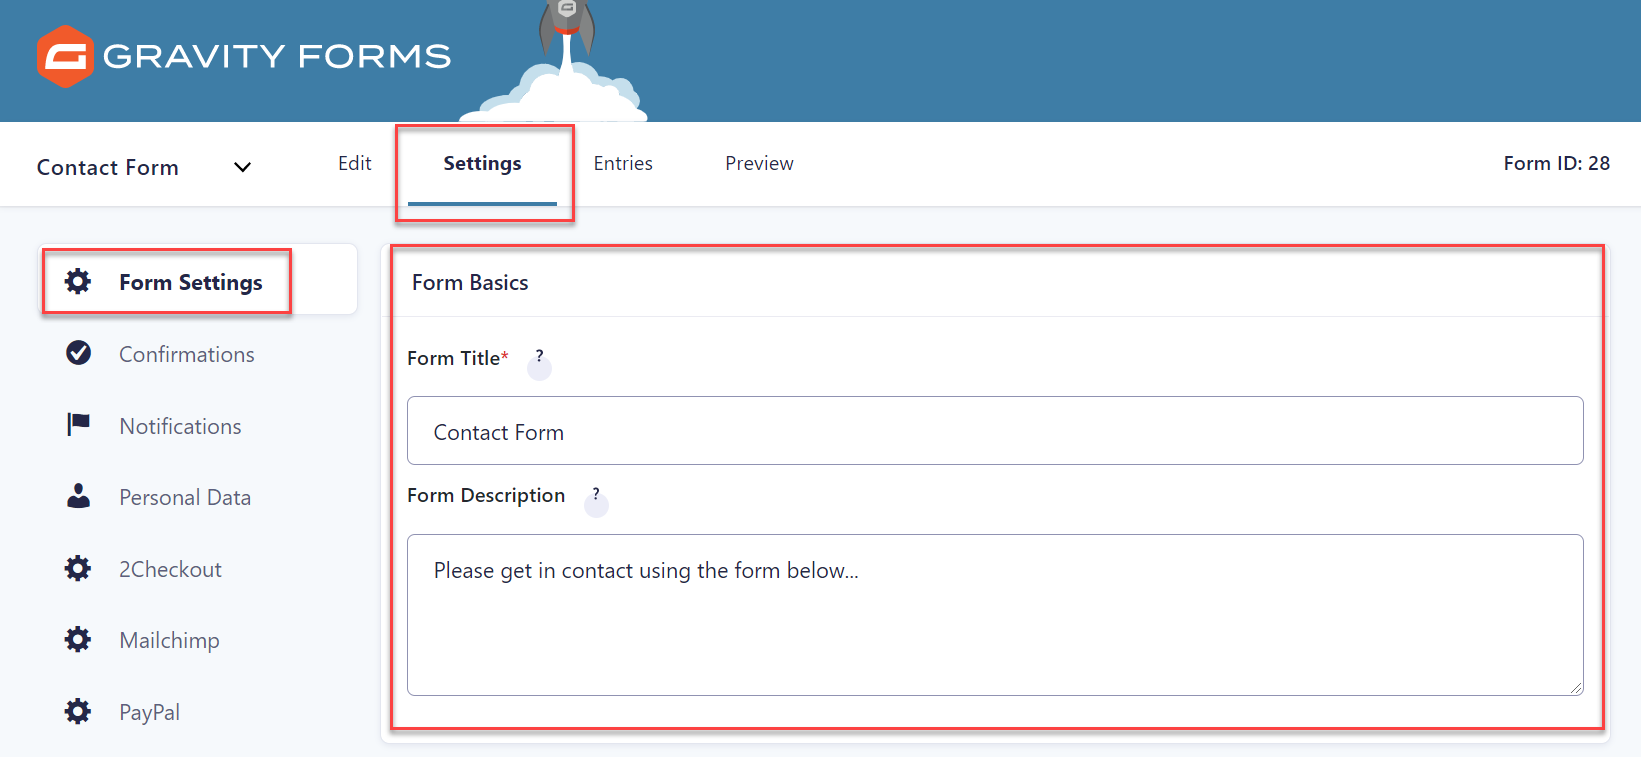
- Form Name and Description – If you want to display the name of your form and a description on the front end of your site, to help encourage your audience to complete the form, then you can alter this text under Form Settings > Form Basics.
- Submit Button – A relevant call-to-action on your submit button, encouraging users to complete and submit the form, can significantly boost submissions. For information on how to do this, check out the article How to Customize the Text on a Form’s Submit Button.

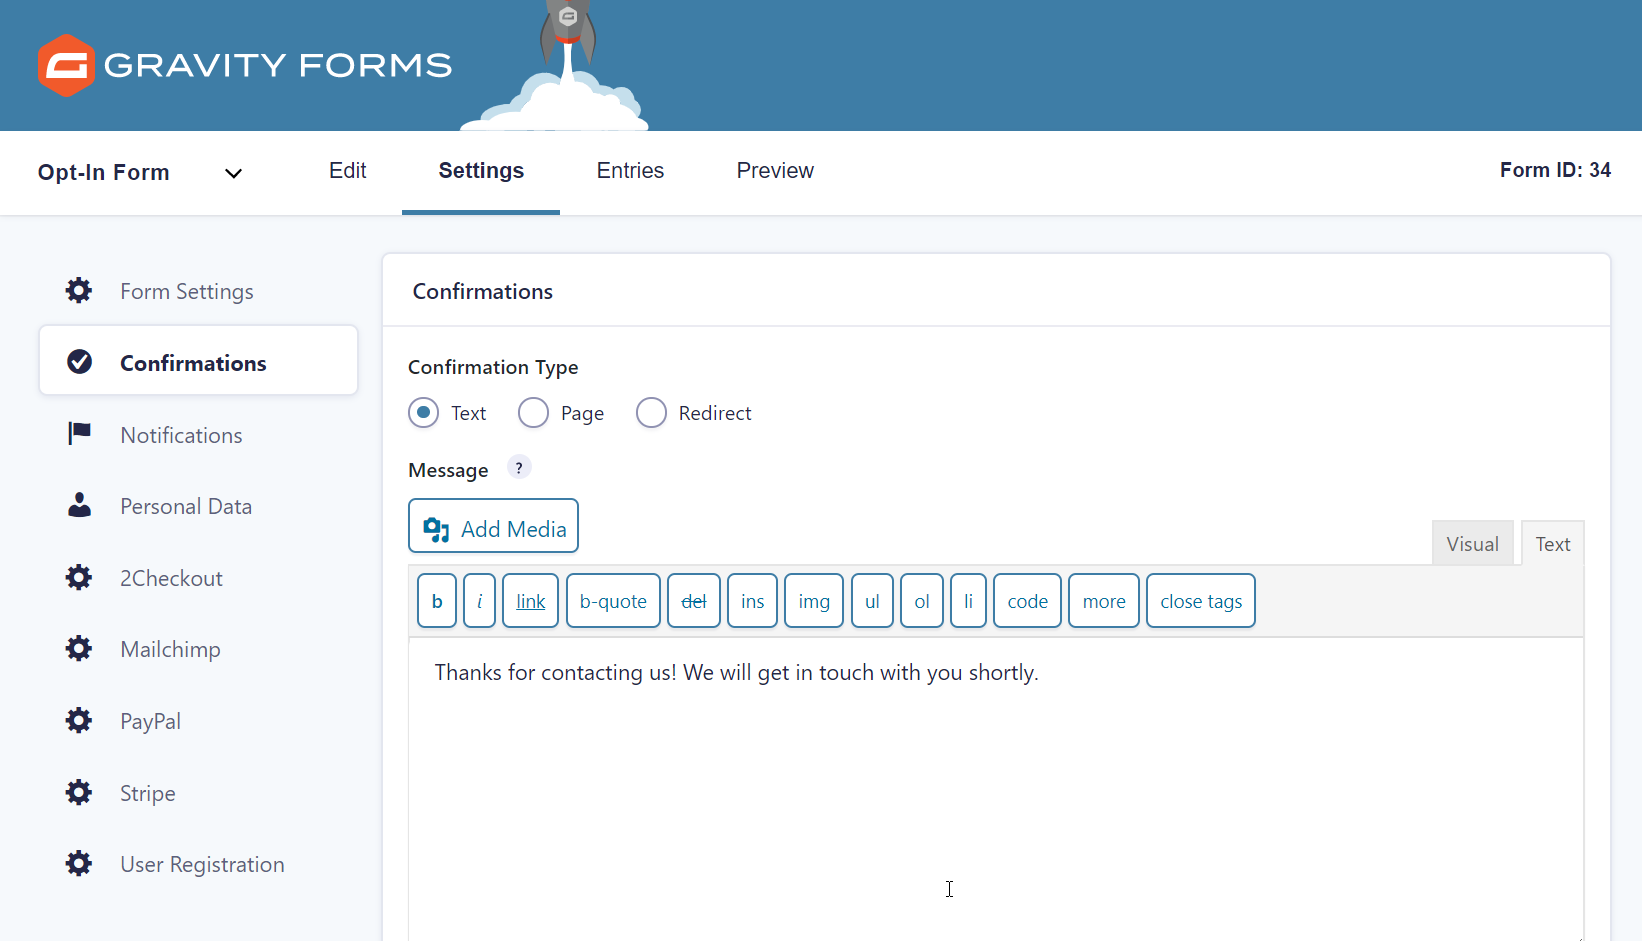
- Confirmations – Unless altered, when a form is submitted, Gravity Forms displays the simple confirmation message… ‘Thanks for contacting us! We will get in touch with you shortly.’ This confirmation message can be easily customized under Settings > Confirmations. Here the text can be re-written to suit your specific needs and help reassure each user that their submission has been received.
Install an Add-On (or two!)
You may want to integrate one or two of Gravity Forms’ numerous add-ons with your form – for a basic contact form you should consider these options…
- Email Add-Ons – Syncing your form with a powerful email marketing solution will help you stay connected with your subscribers in the future. Select from any of the official Gravity Forms email add-ons, including MailChimp, Campaign Monitor, Constant Contact, and many more.
- CRM Add-Ons – Track and organize your newly captured contacts with a CRM add-on. Check out this guide to the Best CRM WordPress Plugins.
- Notification Add-Ons – By default Gravity Forms includes notification email options with every form. However, to customize these to further suit your needs, you might want to set up custom notification emails – SendGrid, Postmark, and HubSpot add-ons are all good options for this.
For more information on how to install and set up individual add-ons, check out the Gravity Forms Add-On documentation.
Embed the Form
Once you are happy with any customizations that you have made to your contact form, all that is left to do is to embed it into a page on your website.
To do so, within your WordPress dashboard, open the appropriate page, click into the Gutenberg editor and add a block where you want the form displayed. Then type Gravity into the Search for a Block function.
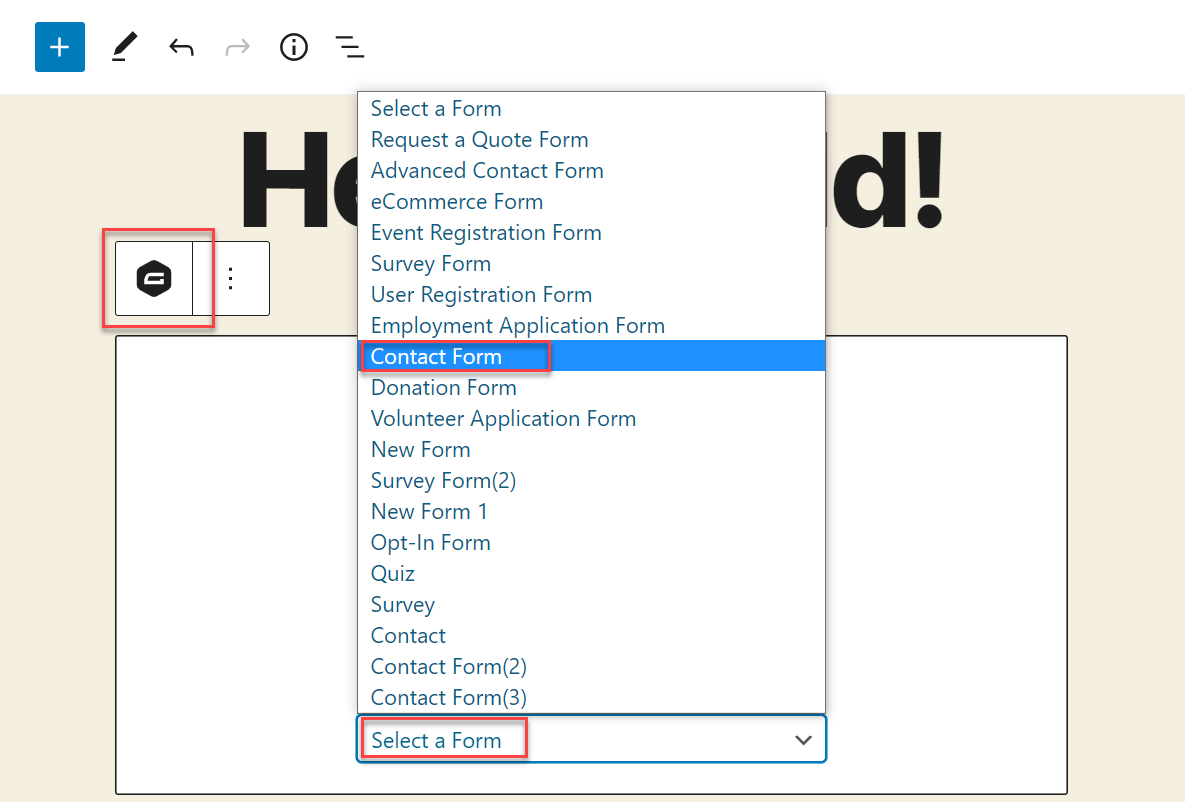
Select Contact Form from the drop-down form options, then Preview the form on the front end of your website. If you are happy with your form, go ahead and Publish the page – and don’t forget to test the form yourself to check that it is working!
If you use the Classic Editor, check out this helpful article in the docs Adding a Form Using the Classic Editor.
Final Thoughts on How to Import and Customize a Contact Form
As you can see, importing and customizing a contact form is a very quick and easy task. The Gravity Forms Template Library contains a number of stylish and fully functional form templates that can all be imported and seamlessly customized in the same way – make sure you check them out!
Not a Gravity Forms customer yet? Sign up for our free demo to check out just how easy it is to customize the form templates as well as create your own forms.
Any questions on how to import and customize a contact form? If so, please ask away in the comments below…

If you want to keep up-to-date with what’s happening on the blog sign up for the Gravity Forms newsletter!